How to Make a 3D Valentine's Paper Heart Garland
As an Amazon Associate I earn from qualifying purchases.

We are a week out from Valentine’s Day and maybe you are scrambling for some cheap and easy DIYs to decorate your space with. Whether its a romantic dinner or a Galentine’s party, decor is a simple way to make the day feel more special and thoughtful. We have done a few Valentine's DIYs this love season ranging from a heart pom garland and a matching door hanger to another version of a paper heart garland and even a spotlight on the ‘Valentine Heart’ Hoya plant.
This DIY is almost identical to our paper heart garland but with a couple added steps to make the heart become 3D. My hearts are three sided but you could add as many sides as you want. I ran to Home Depot to grab 800,000 paint chips and then ran out like. I felt like I stole them even though I know they are free. If you want your entire heart to be the same color grab multiple of the same paint chips. My paint chips fit two heart punches each.
Jump to the bonus Confetti DIY at the end which uses your leftover paint chips.
Tips and Tricks
Make sure your punch and your paint chips align in size. Paint swatches are generally 2in wide with some variance. The ones I grabbed were 3in wide but only featured one color as opposed to the color gradient sheets so I had to grab more of them but as a result could have larger hearts.
Hole punches come in a wide variety of shapes and sizes so you could do this for any holiday (Christmas tree and snowflake) or a non-holiday decor item (stars and flowers).
My hearts are 3 sided but I think 4 sided would have been really cute too. When you get to the 5 and 6 sided your heart will really start to round out which could be ideal but you will need a ton of paint chips and I used my stash on my other garland.
I used 1mm macrame for my string as its cream colored, thin but still strong. You could definitely use ribbon or any string from a craft store.


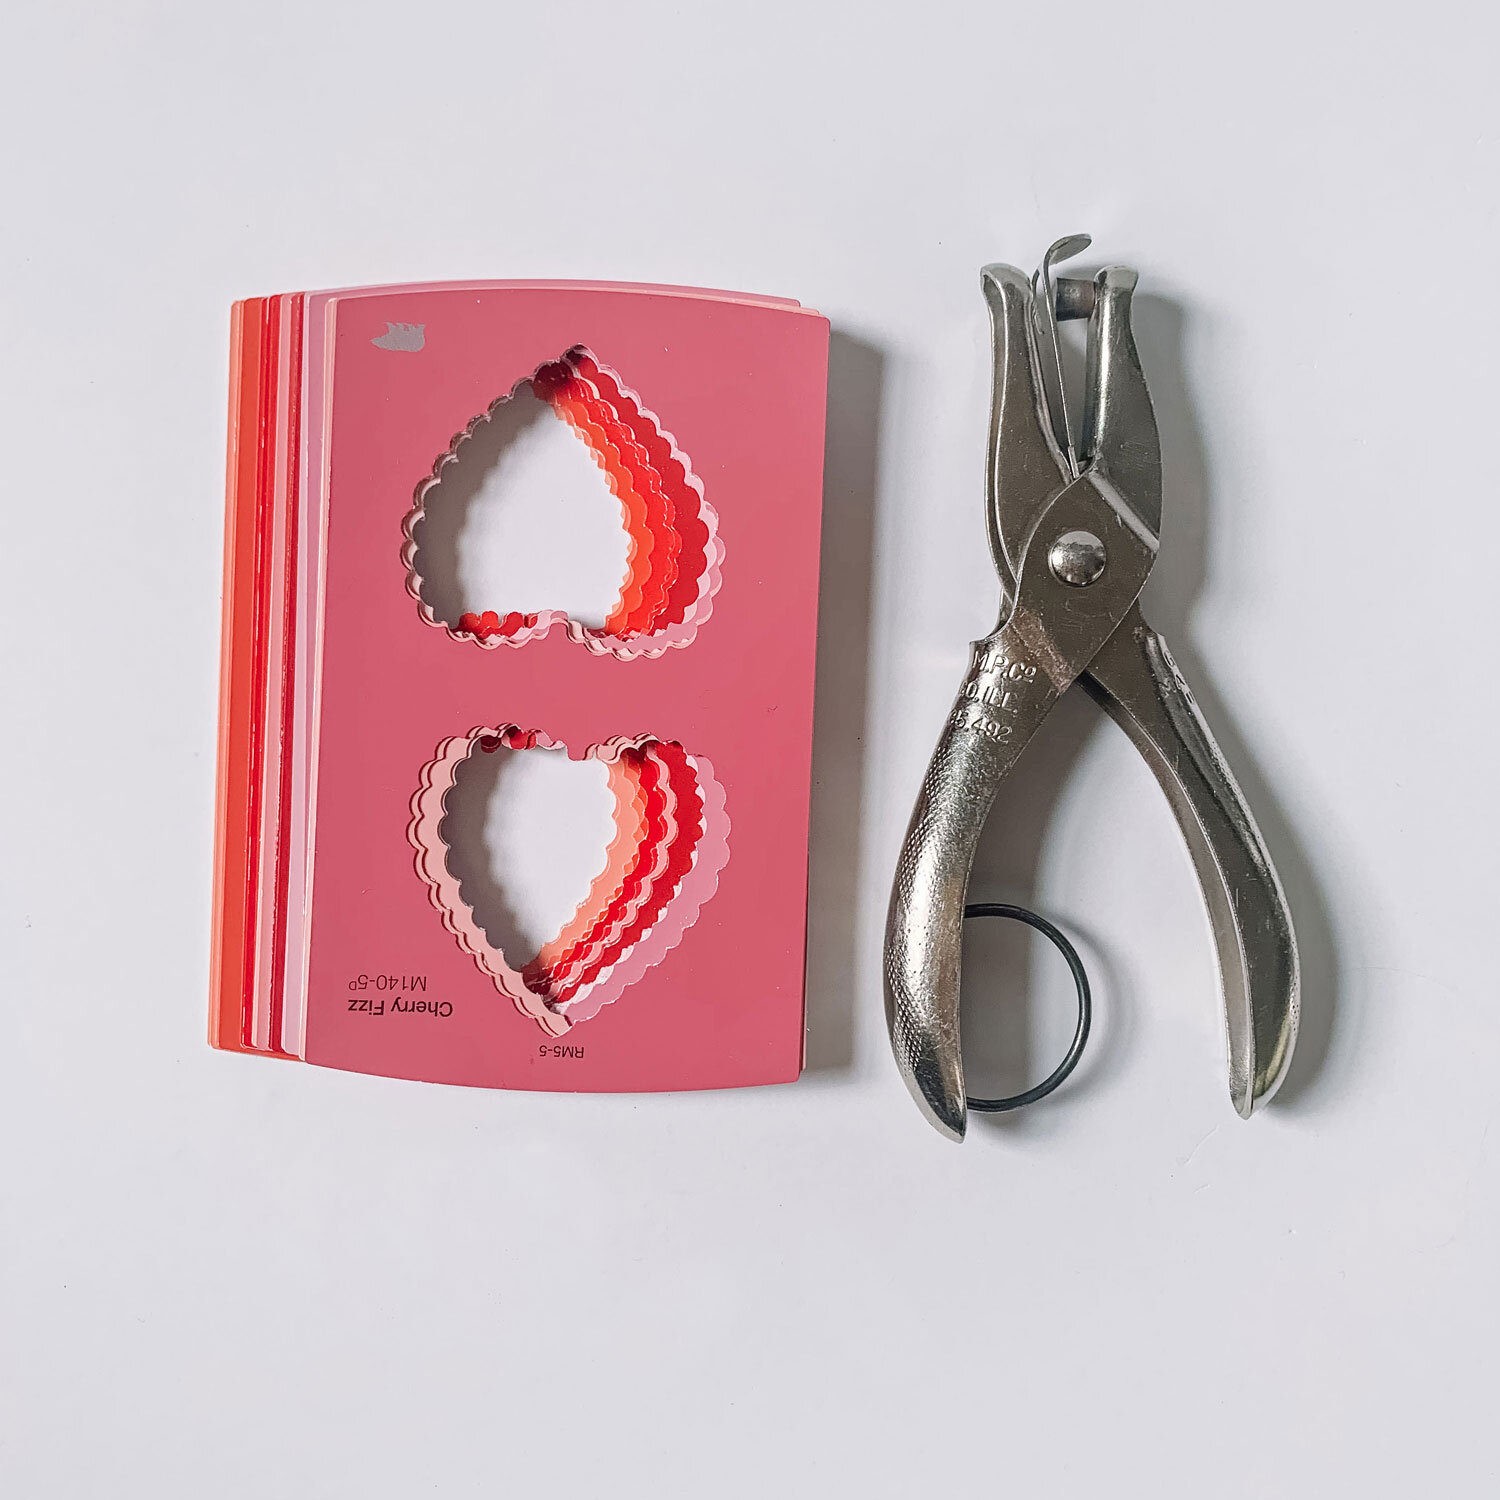
Supplies

Supplies

Punch Hearts
Depending on what size your paint swatches are, you can punch 1 or more heart on each one.

Fold Hearts
Fold all your hearts in half with the edges folding in towards the colored side.

Tape Hearts
Using double sided tape, place a strip on one of the back halves of the heart.

Attach Hearts
Take another of your hearts and line it up with the other. Squeeze it together. Repeat one more time.

Add String
Using your string, place it in the middle of the hearts. Add a strip of tape to one of the back halves. Squeeze the sides together, capturing the string in the middle.

Layout Hearts
Roll out your string and ruler. Layout your hearts in your desired color pattern alongside them. Mine had 4” in-between them. Keep repeating steps as you attach your hearts.

Options!
1: If you would like to hang your hearts from the ceiling, you can make a loop at the end of the string and tie a knot.
2: Mine are being draped so I trimmed the string right against the edge.

Hang it!
Hang it on the wall with the other garlands, drape it across your art, create a streamer effect in your doorway. Go for it!
Bonus: Valentine’s Confetti
Grab a Hole Punch
Take the paint chips you just used and grab a hole punch. Punch out as many as you want. Prepare for a forearm workout.


Confetti!
Sprinkle it around your table or inside some balloons for a fun pop!


Yay we are done with the Valentine’s season! It isn’t necessarily my favorite but I do love pink. I think my next focus will be some plant and design posts, I am DIY’ed out from the last couple months.
Keep an eye out or subscribe to my newsletter for updates! Hope you like this one and let me know how yours turns out in the comments or by tagging me on instagram @thegreenmadhouse.

