How to Make a Macrame Plant Basket
As an Amazon Associate I earn from qualifying purchases.

I have been on a real macrame kick, so I decided to figure out how to make a macrame plant basket. This past few weeks I have been exploring different knots, braids and dye-ing techniques with my new favorite material. I have made a few different plant hangers but have not done any type of container for the ground so I thought I would try and make a basket.
I already have a lot of macrame and besides that and scissors, you just need a dowel rod, though you could really use anything that is about half an inch to an inch wide and is a few inches longer than your basket. Coming in at zero dollars, I would call this DIY a win. What I did not anticipate is how long it would take me to do all the knots. I aimed high and tried to make a large basket, approximately 9” tall and 27” circumference, and it took me most of the day. I have a hurt knee so it was a pretty perfect activity for a cold and wet day in Seattle.
Here are some takeaways from what I learned while making this and would not do next time around.
I wish I had selected a thicker macrame, 5mm or 6mm, as that would mean less knots for my basket since it was a larger size. However, if I had been making a smaller basket, 3mm or 4mm is perfect.
I picked a more complicated pattern and since this was my first time around, I was unsure of the best way to go about it. I think if I tried this pattern again it would look better. However, for your first time, I would keep it to stripes or solid colored.
I didn’t have a comb to brush out the macrame ends so it took a long time to do by hand. I have learned since that those metal brushes you use on your cats and dogs? Yeah, those. They are perfect to untangle the macrame.


Cut Macrame
Cut pieces of macrame to 3 times the circumference of the pot you are surrounding. The number you need depends on the height of your basket.

Larks Head Knot
Fold each piece in half and tie a larks head knot. Make sure the ends are even.

Repeat
Repeat until you reach your desired length (ie height of basket). Once you start braiding, they may space themselves out more.

Knot Macrame
Cut any length macrame, I used about 50"-60” each time, and begin your vertical clove hitch knots.

Pull Tight
Pull tight and push to the top.

Repeat
Now repeat on the strand to the right, Making sure the macrame goes underneath first. Keep repeating.

Work Backwards
When you have gone as far as you like with that color, start working your way back to the left, using the same knot. You can continue this process as long as you like creating any pattern.

Create Pattern
I went with a checkered pattern but wish I had gone for something easier like stripes or even solid. Floyd had a lot of fun “helping” by picking up strings in his mouth and running away with them.

Connect Ends
When you have reached your circumference of the pot you are surrounding, pull out your dowel, bend the weave into a circle, and slide the ends of your rope through the larks head knots. This allows your size to be adjustable.

Trim Macrame
Cut the macrame ends so they are even and use your fingers or a comb to unravel the macrame to create a soft fringe.
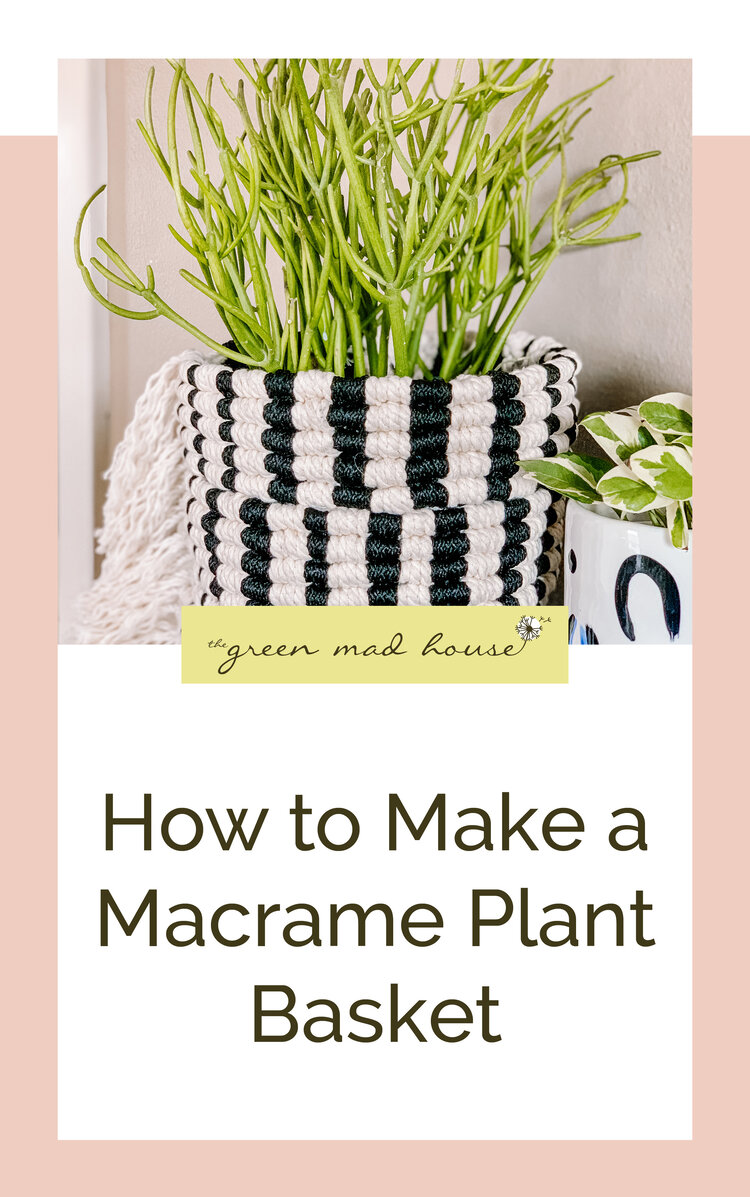


Alright now we have a finished woven basket. All that is left is to slide it down around your plant. I just repotted this pencil cactus (I wrote a guide to repotting) into a plastic nursery pot as I didn’t have a planter that fit at the moment. Now the ugly pot is covered and the basket really makes my cactus shine.
After all the knotting, my fingers are kind of raw, but it is worth it because my pencil cactus has a cute new home. It has grown quite big in the time I have had it and now that spring is approaching I am already seeing babies coming up. Now it has something it can grow into but I can switch it at any time to another plant if I want too.
This basket could really be used for any item with the additional of a bottom. I think something as simple as coiling the macrame in a circle and gluing it in could work. A mini basket would be perfect for a pencil holder, a medium one for bathroom products, and a large one for blankets or towels. What do you think? Let me know how yours turns out in the comments.