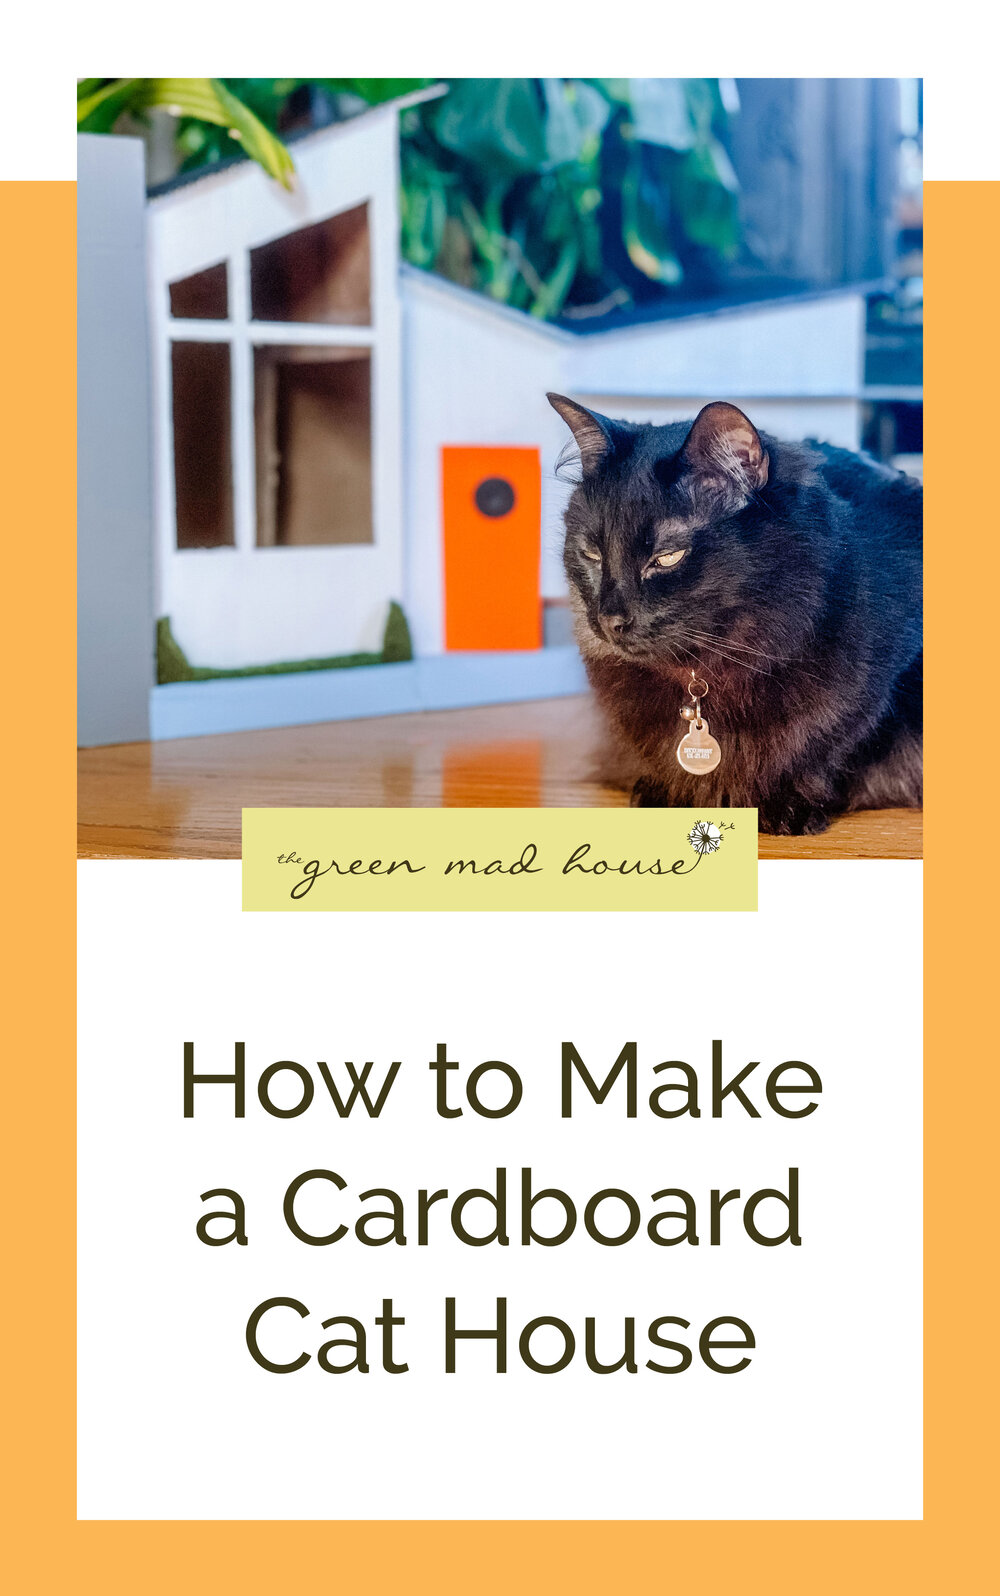
How to Make a Cardboard Cat House
As an Amazon Associate I earn from qualifying purchases.
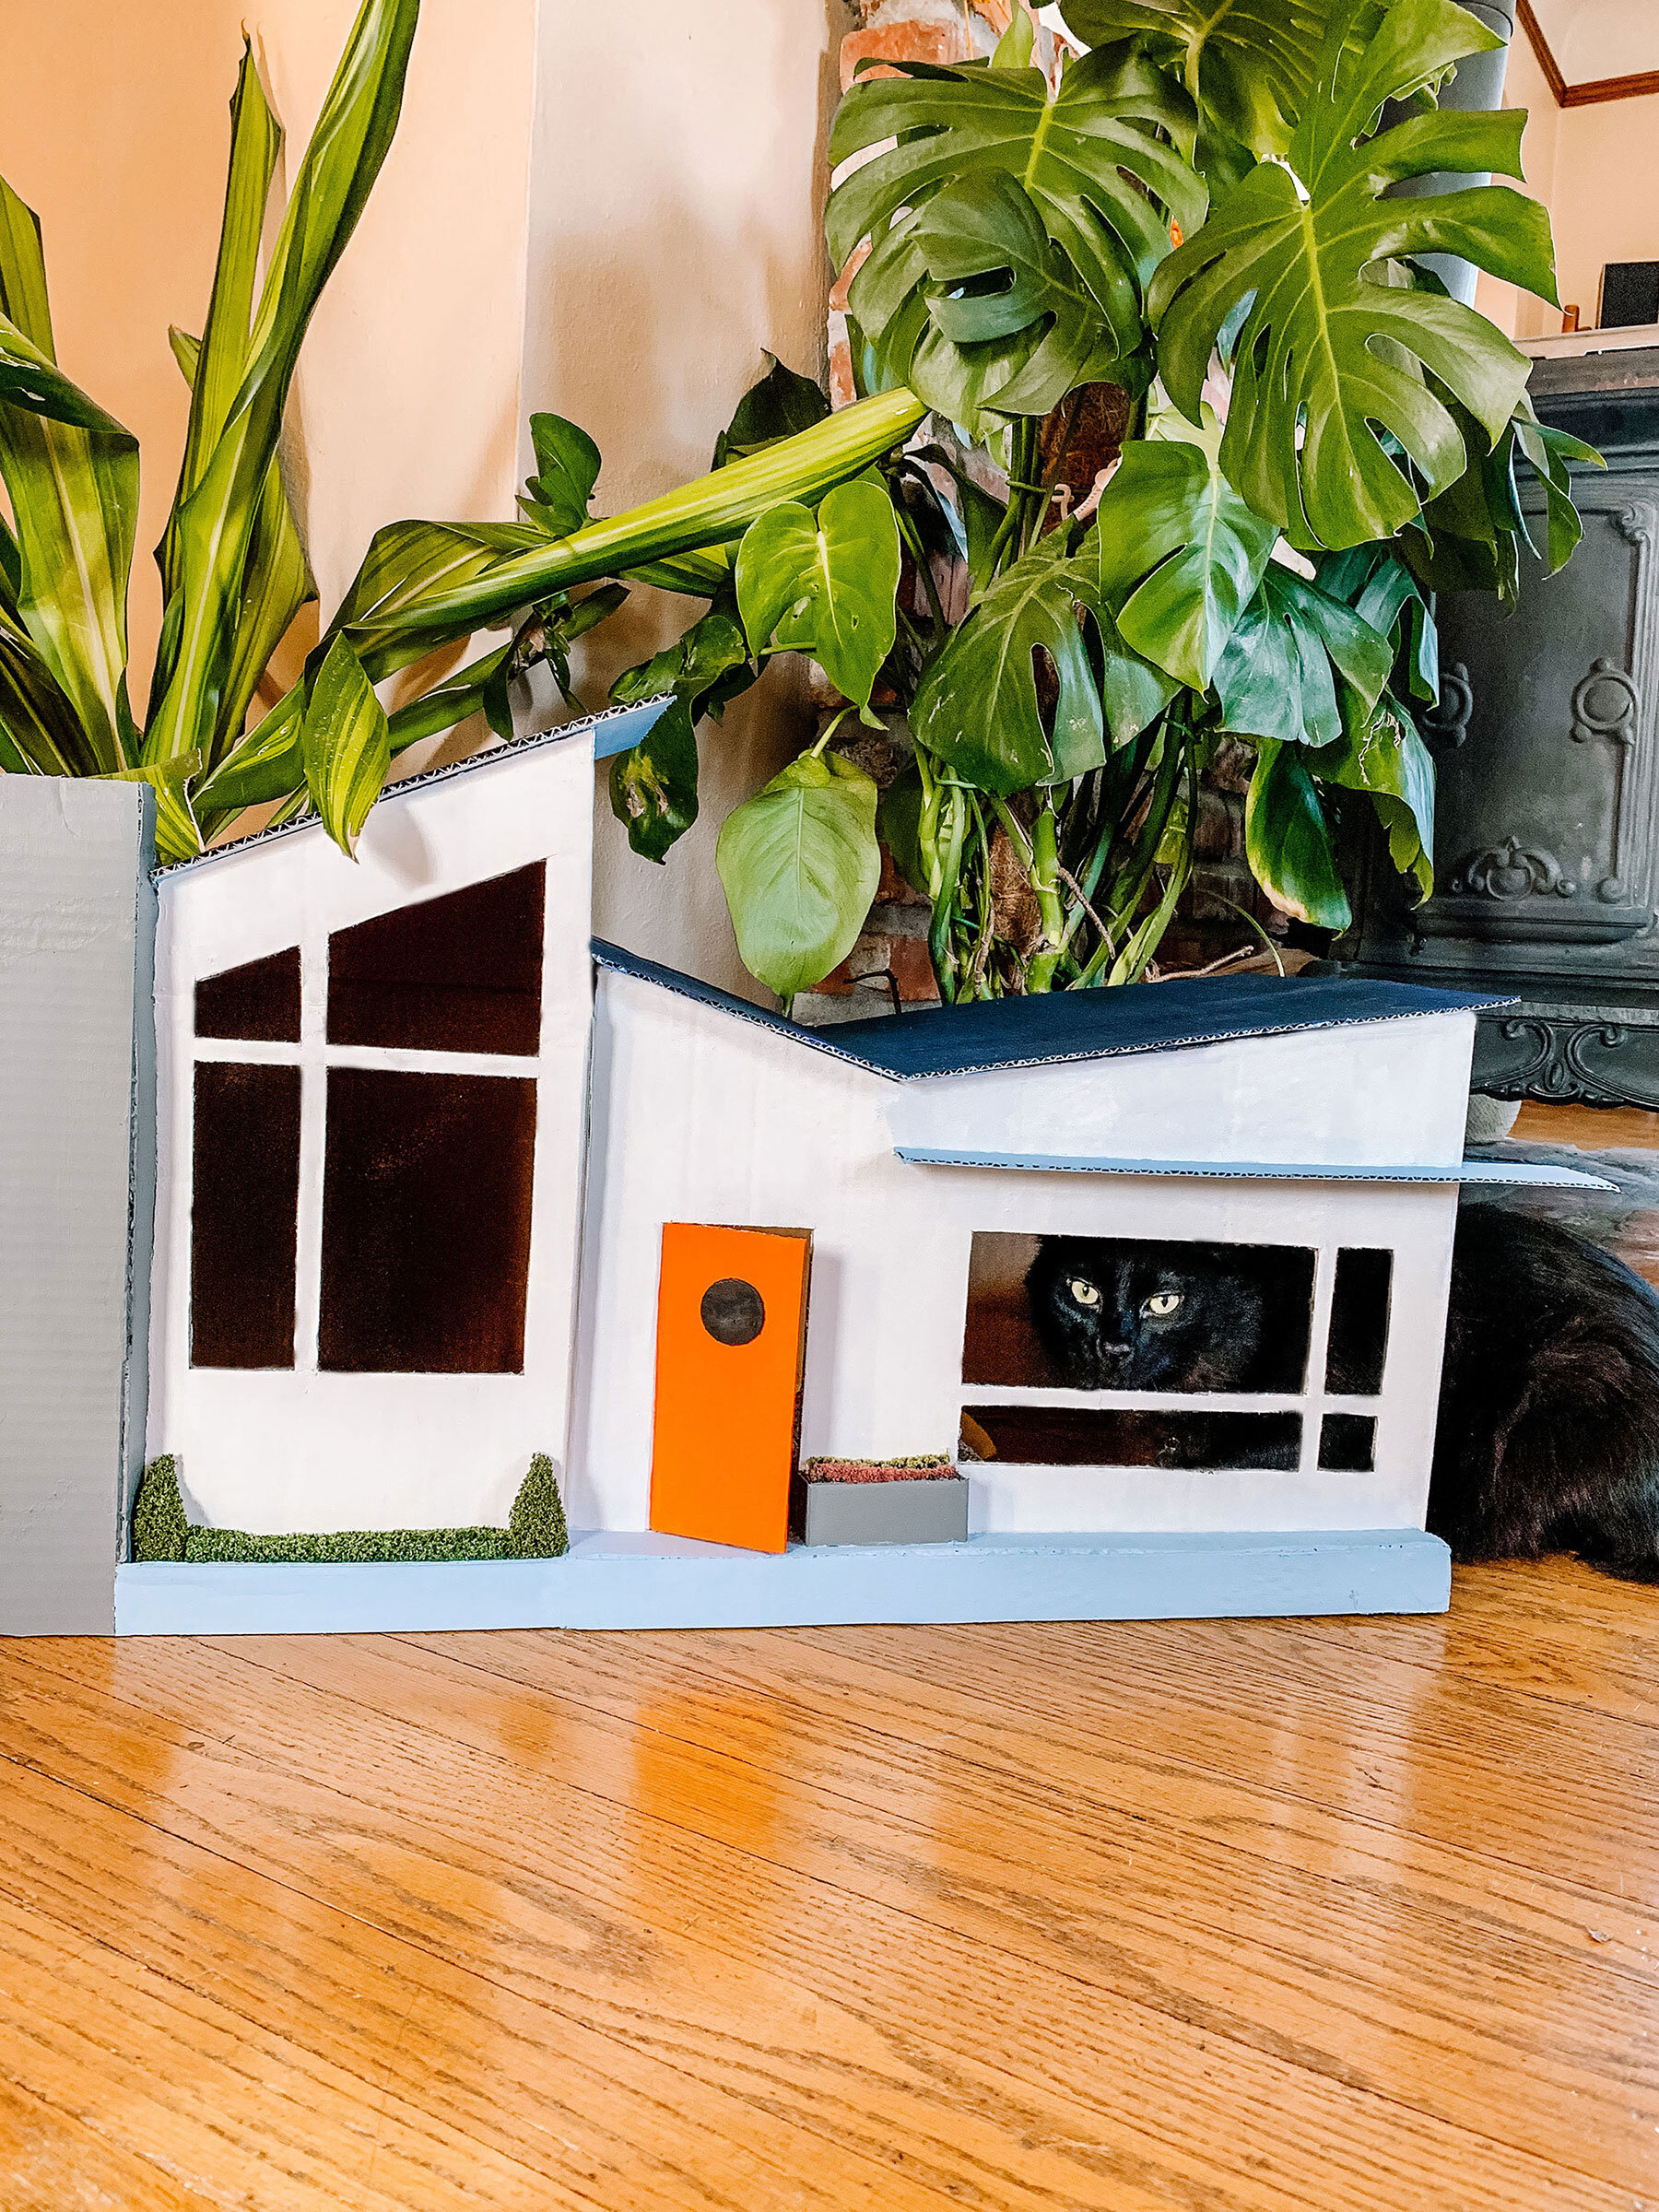
Armed with some cardboard boxes and creativity, I decided to make my cats a mid century cat house. I am pretty happy with how it turned out and decided to name it the Mid Century Meow-nor. Huckleberry has slept in it all day while I have been working and Floyd put his catnip banana inside so it has gotten the Cat Seal of Approval. My cat’s are really destructive so we will see how long it lasts. I already did a DIY for a water bowl if you want to get even more cat crazy.
This DIY can be customized in many ways so the sky is the limit! The most important thing is your base. I used two boxes for the house structure, my Hello Fresh delivery box and an Amazon box. The size of the box(es) you have will determine the shape of your house. My two cats are both large and love cuddling, so I wanted a space that could fit them both if need be; hence why I used two boxes.
Tips and Tricks
- Once I knew the shape and dimensions of my house, I made a sketch of where the windows, fireplace, planters, door, step and roof would go. This helps you plan out the dimensions and think it through before you start cutting away.
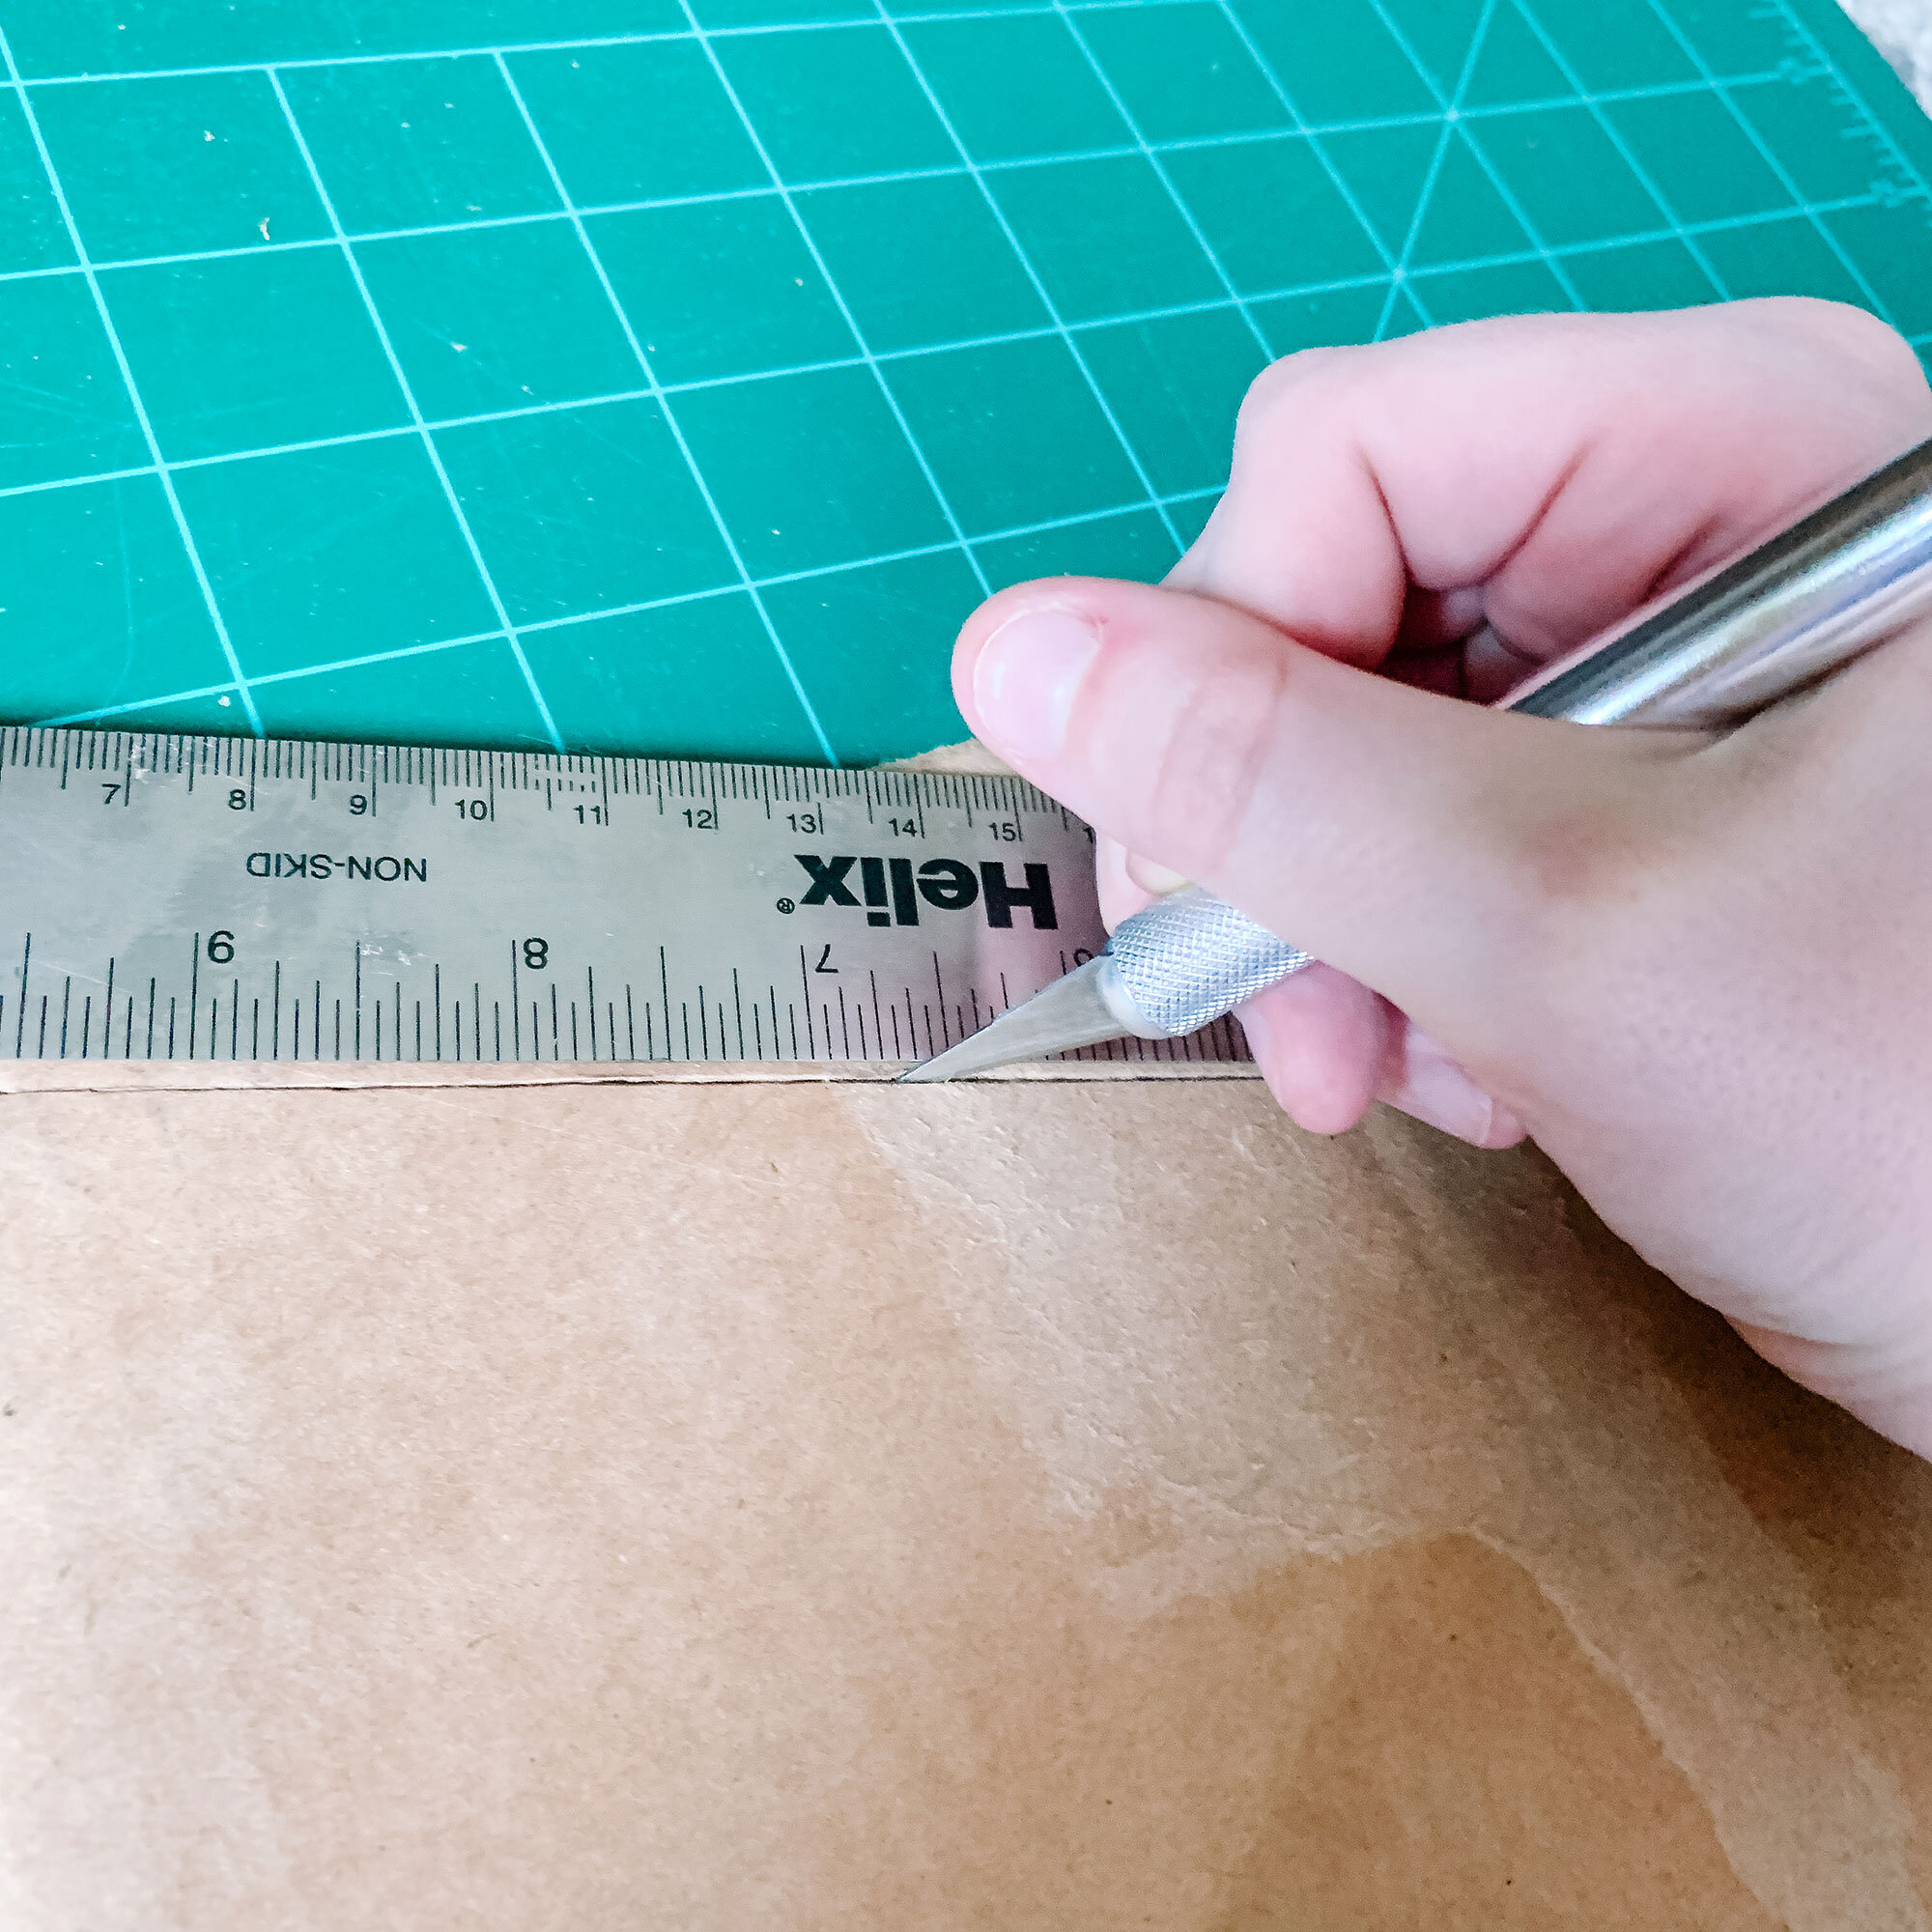
- Make sure to use a metal ruler. If you use plastic or wood you will slice the edges away when cutting.
- Only cut three sides of the door if you want it to be able to open.
- For the roof. I left the top box flaps as they provide extra support for the ceiling (remember my cats are chonky) but I removed the bottom box flaps where the floor would be.
- For the add-on items (fireplace, steps, planters, roof) I measured the place they were going in and used the leftover cardboard from the box flaps to cut these out.
- After gluing the extra elements on I used painters tape to hold the pieces as they dry. I recommend this or just general scotch tape. If you use packing tape, when you remove it you will remove some of the cardboard with it which makes it harder to paint later on.

- For the two roof sections I needed sheets that were bigger than the boxes themselves by an extra 2 inches to allow for the roof overhang. Luckily I had a third box from amazon that was very long and was able to utilize that.
- When it was time to unflatten the boxes and glue them together, I used chip clips to clamp them together.
- I had some leftover white spray paint, so I took my cat house outside and gave it a coat of white. This serves as a primer so when you paint the other colors on, you need way less coats.
- I wanted a classic mid century look so went with a white house, dark grey rock, bright orange door and light blue accents. I just used the cheap acrylic paint from any craft store.
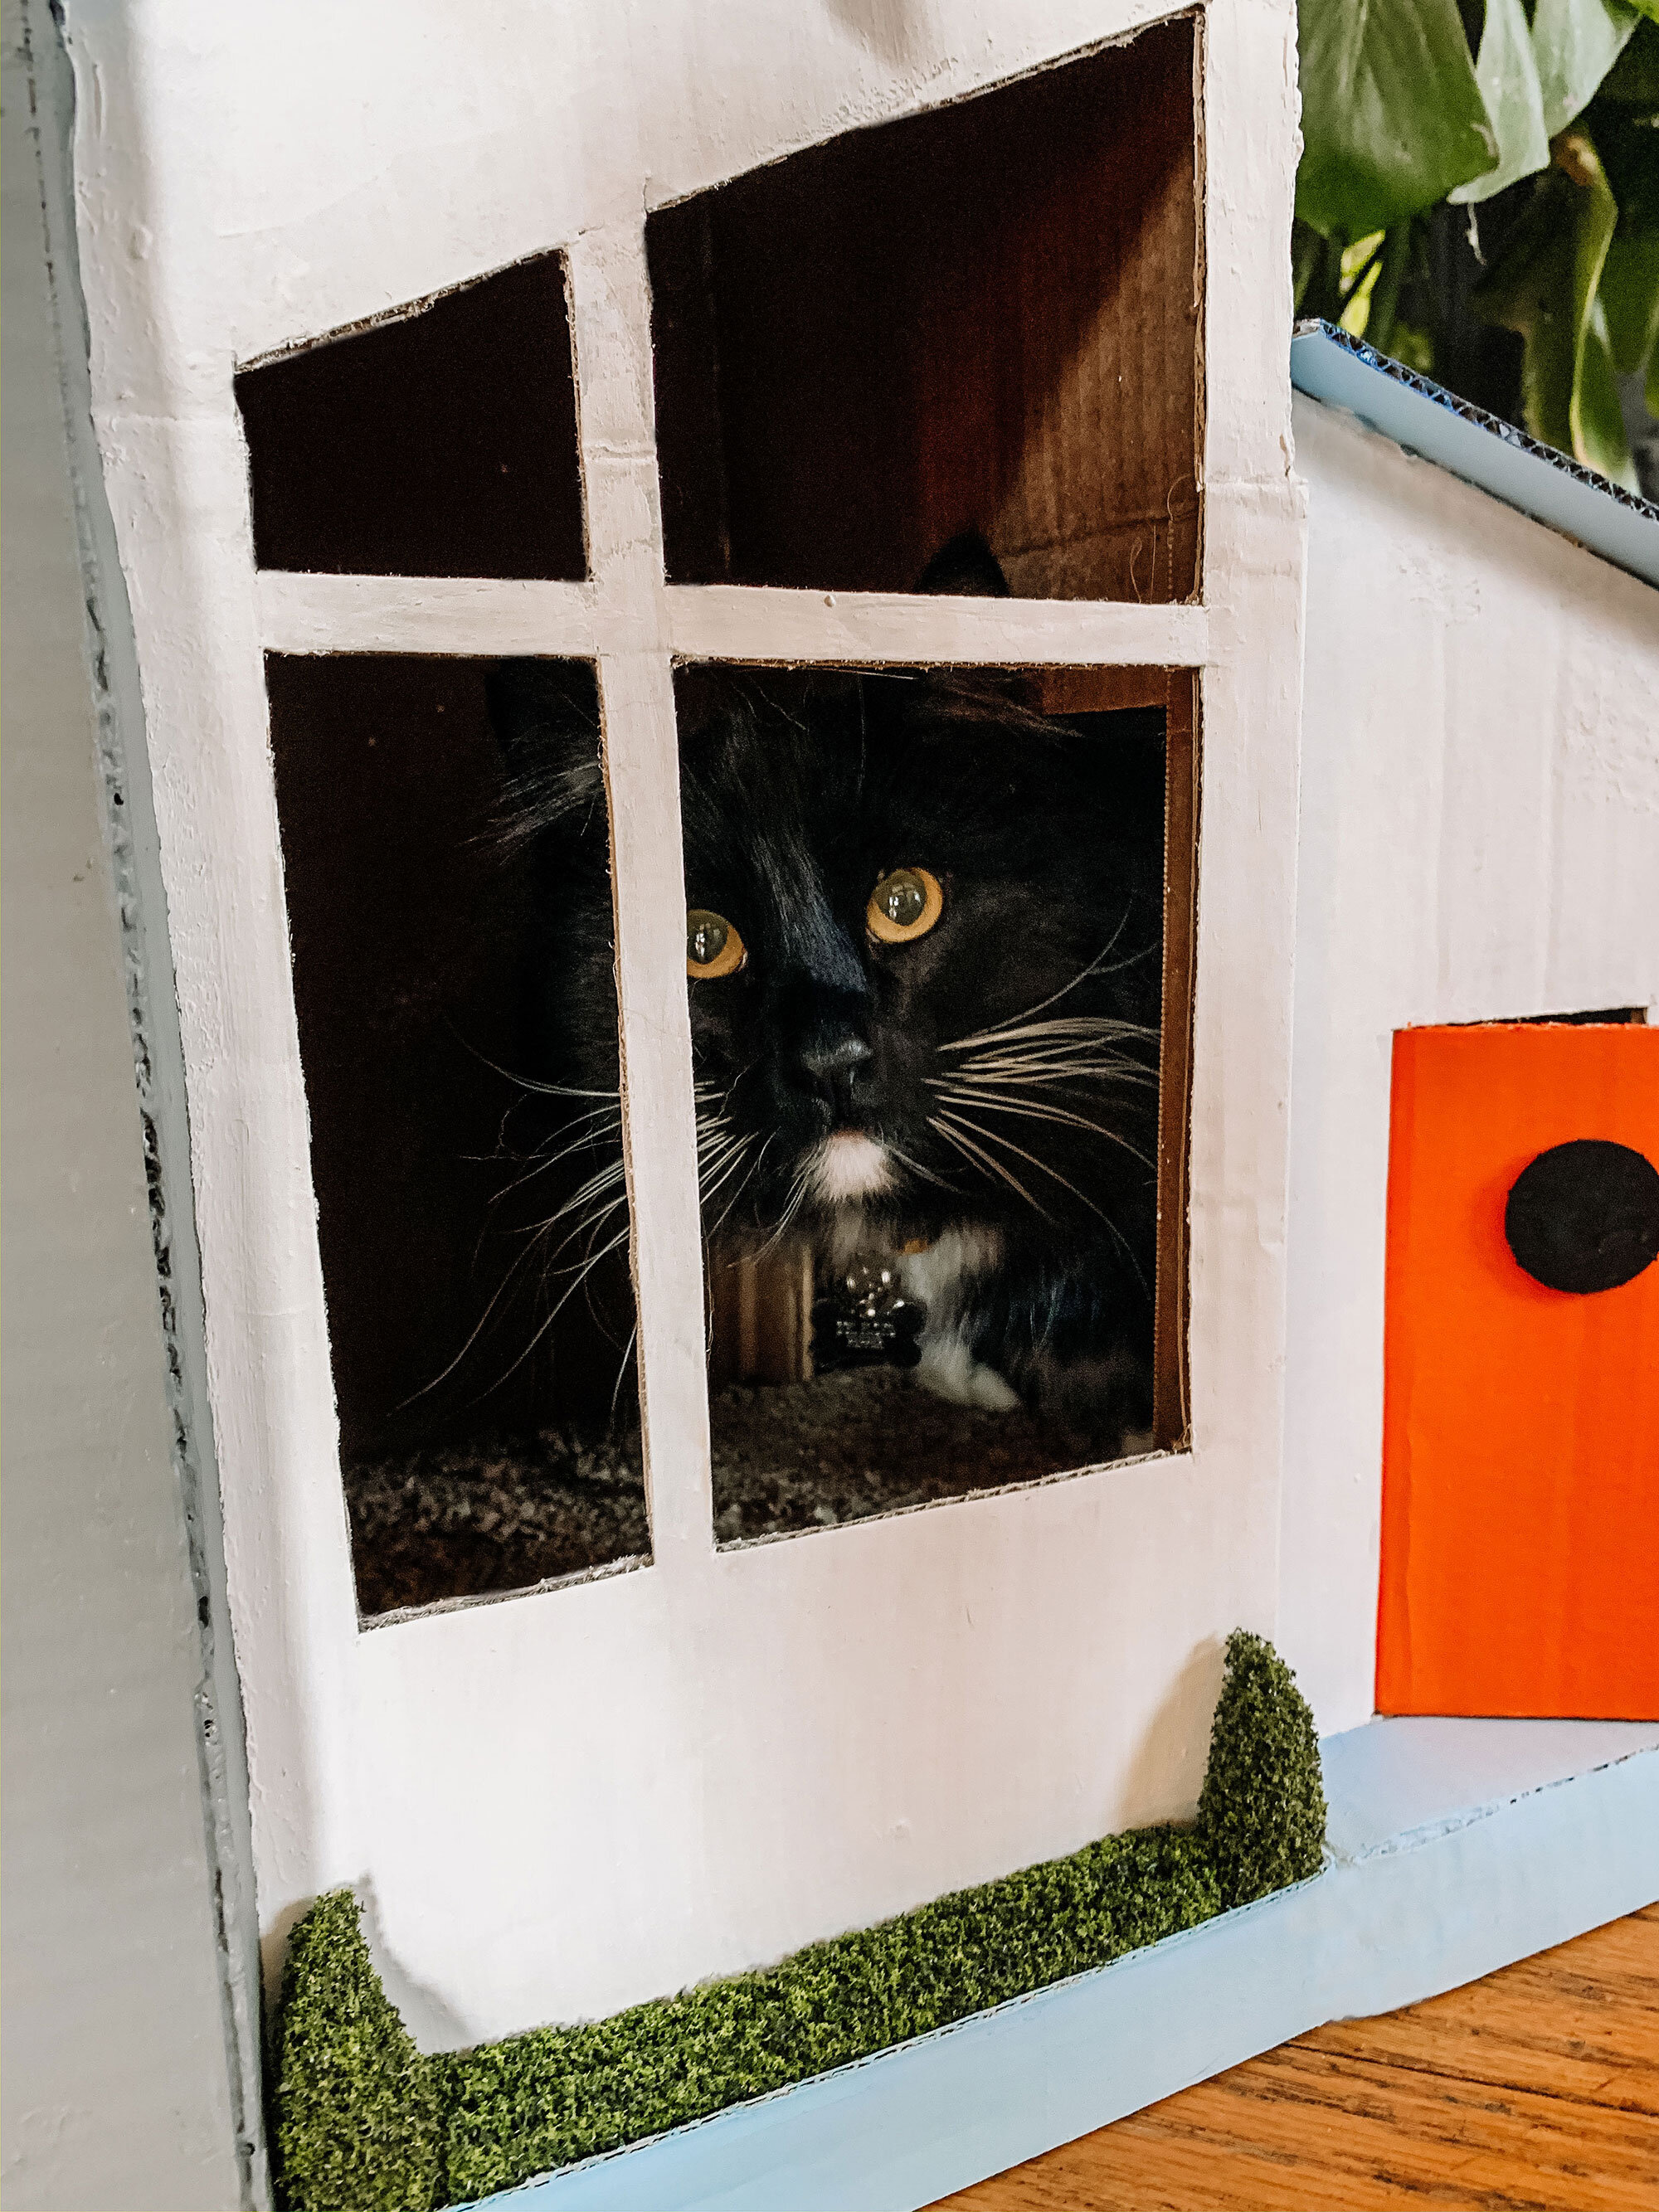
- I wanted to grow some catnip grass in the planters but Huckleberry eats it in one second, roots and all, so that wasn’t an option. Instead I used fake dollhouse hedges that I happened to have from a dollhouse store and some sphagnum moss.
- I then slid the Hello Fresh cardboard insulation inside because they love to lay on that stuff and tear it up. Their cardboard scratcher or a bed would have worked too!
UPDATE: It has been almost a year since I made this and the cats still use it frequently. Floyd loves laying on top of the roof and Huckleberry prefers laying inside. Sometimes he enters through the small windows and I am amazed they haven't all broken... also why is he doing that? Looking back I wish I had kept the floor in the bottom for extra support. I have added their cardboard cat scratcher inside and sprinkle catnip on it for extra goodness. Still really happy with how it turned out and that my cats love it.


Supplies

Plan Your Design
This is my design with the listed dimensions if you want to reference it. Click it for a larger image!

Prepare the Boxes
Flatten your boxes and remove all tape and stickers.

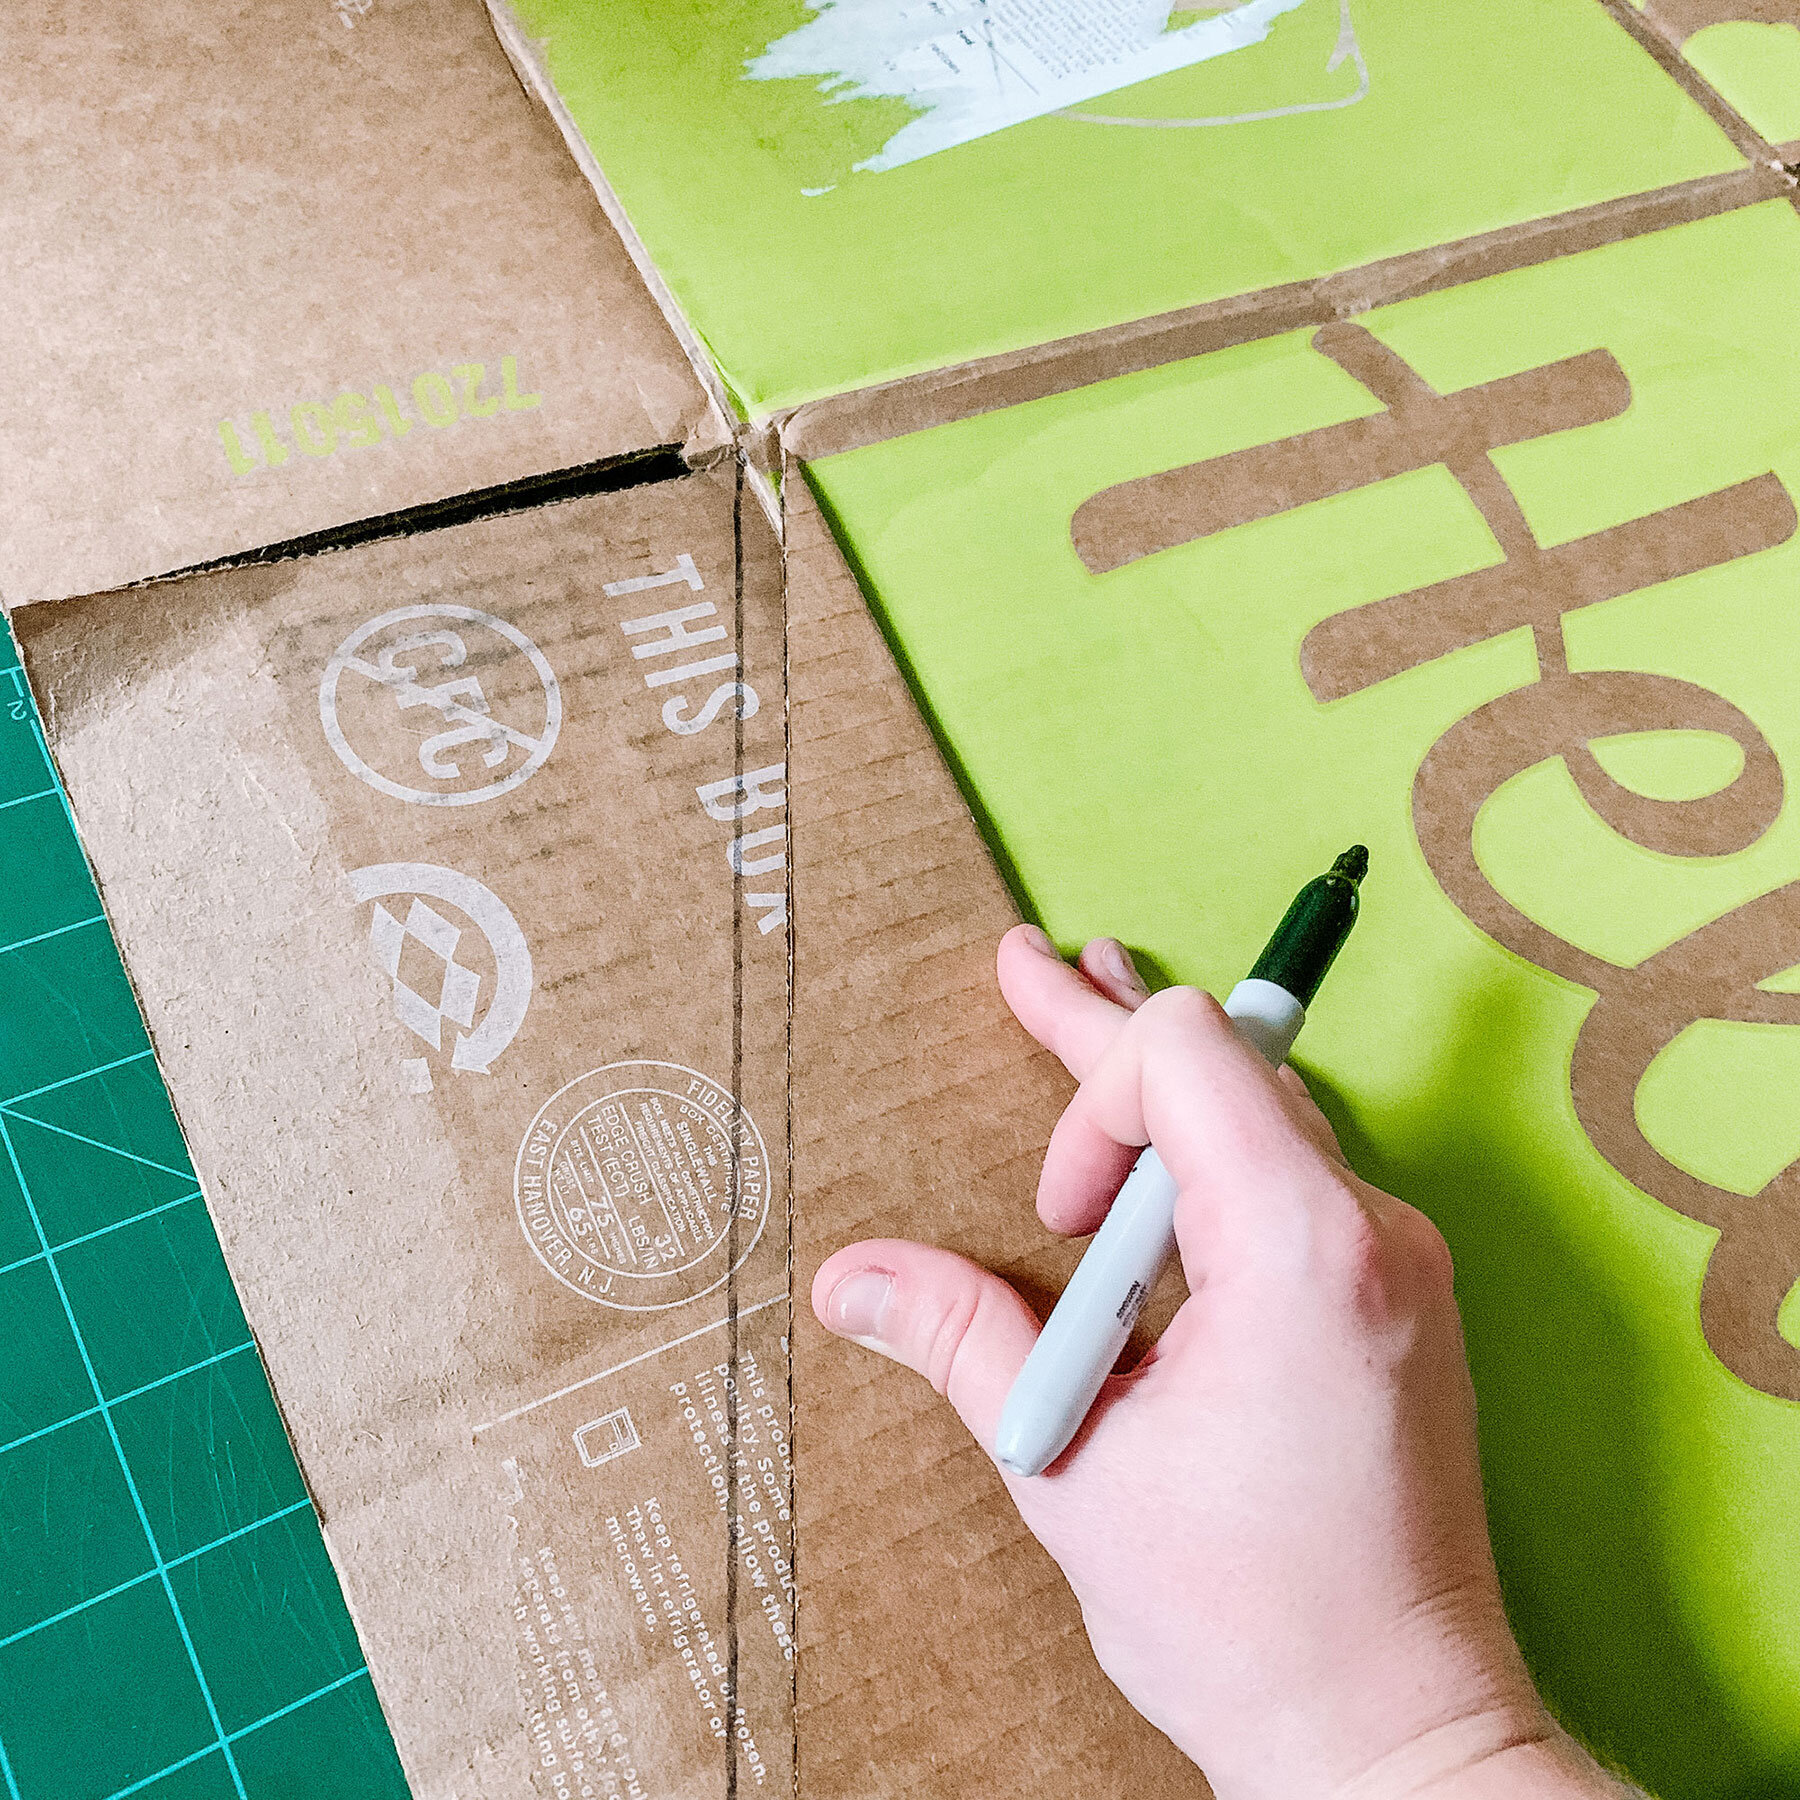
Draw Your Cut Lines
Draw out your windows, door, roof line, cat access and anything else that needs to be cut from your main house (box). Use scrap pieces for your roof, planters and fireplace.
Cut Out Your Pieces
Use an exacto knife or box cutter to cut these shapes out.
Tip:
When doing the roof lines only cut one side out. Then take the cardboard you cut away, flip it, and trace it on the opposite side for a mirror image. This insures your roof will be even.

Pet Your Assistants
Make sure to give your assistants ample pets and treats to insure high quality work.

Scour Lines
Instead of cutting out individual pieces for the add-ons, cut one piece and scour the surface to make it easy to bend. Lightly run your exacto across the surface, making sure to not cut all the way through.
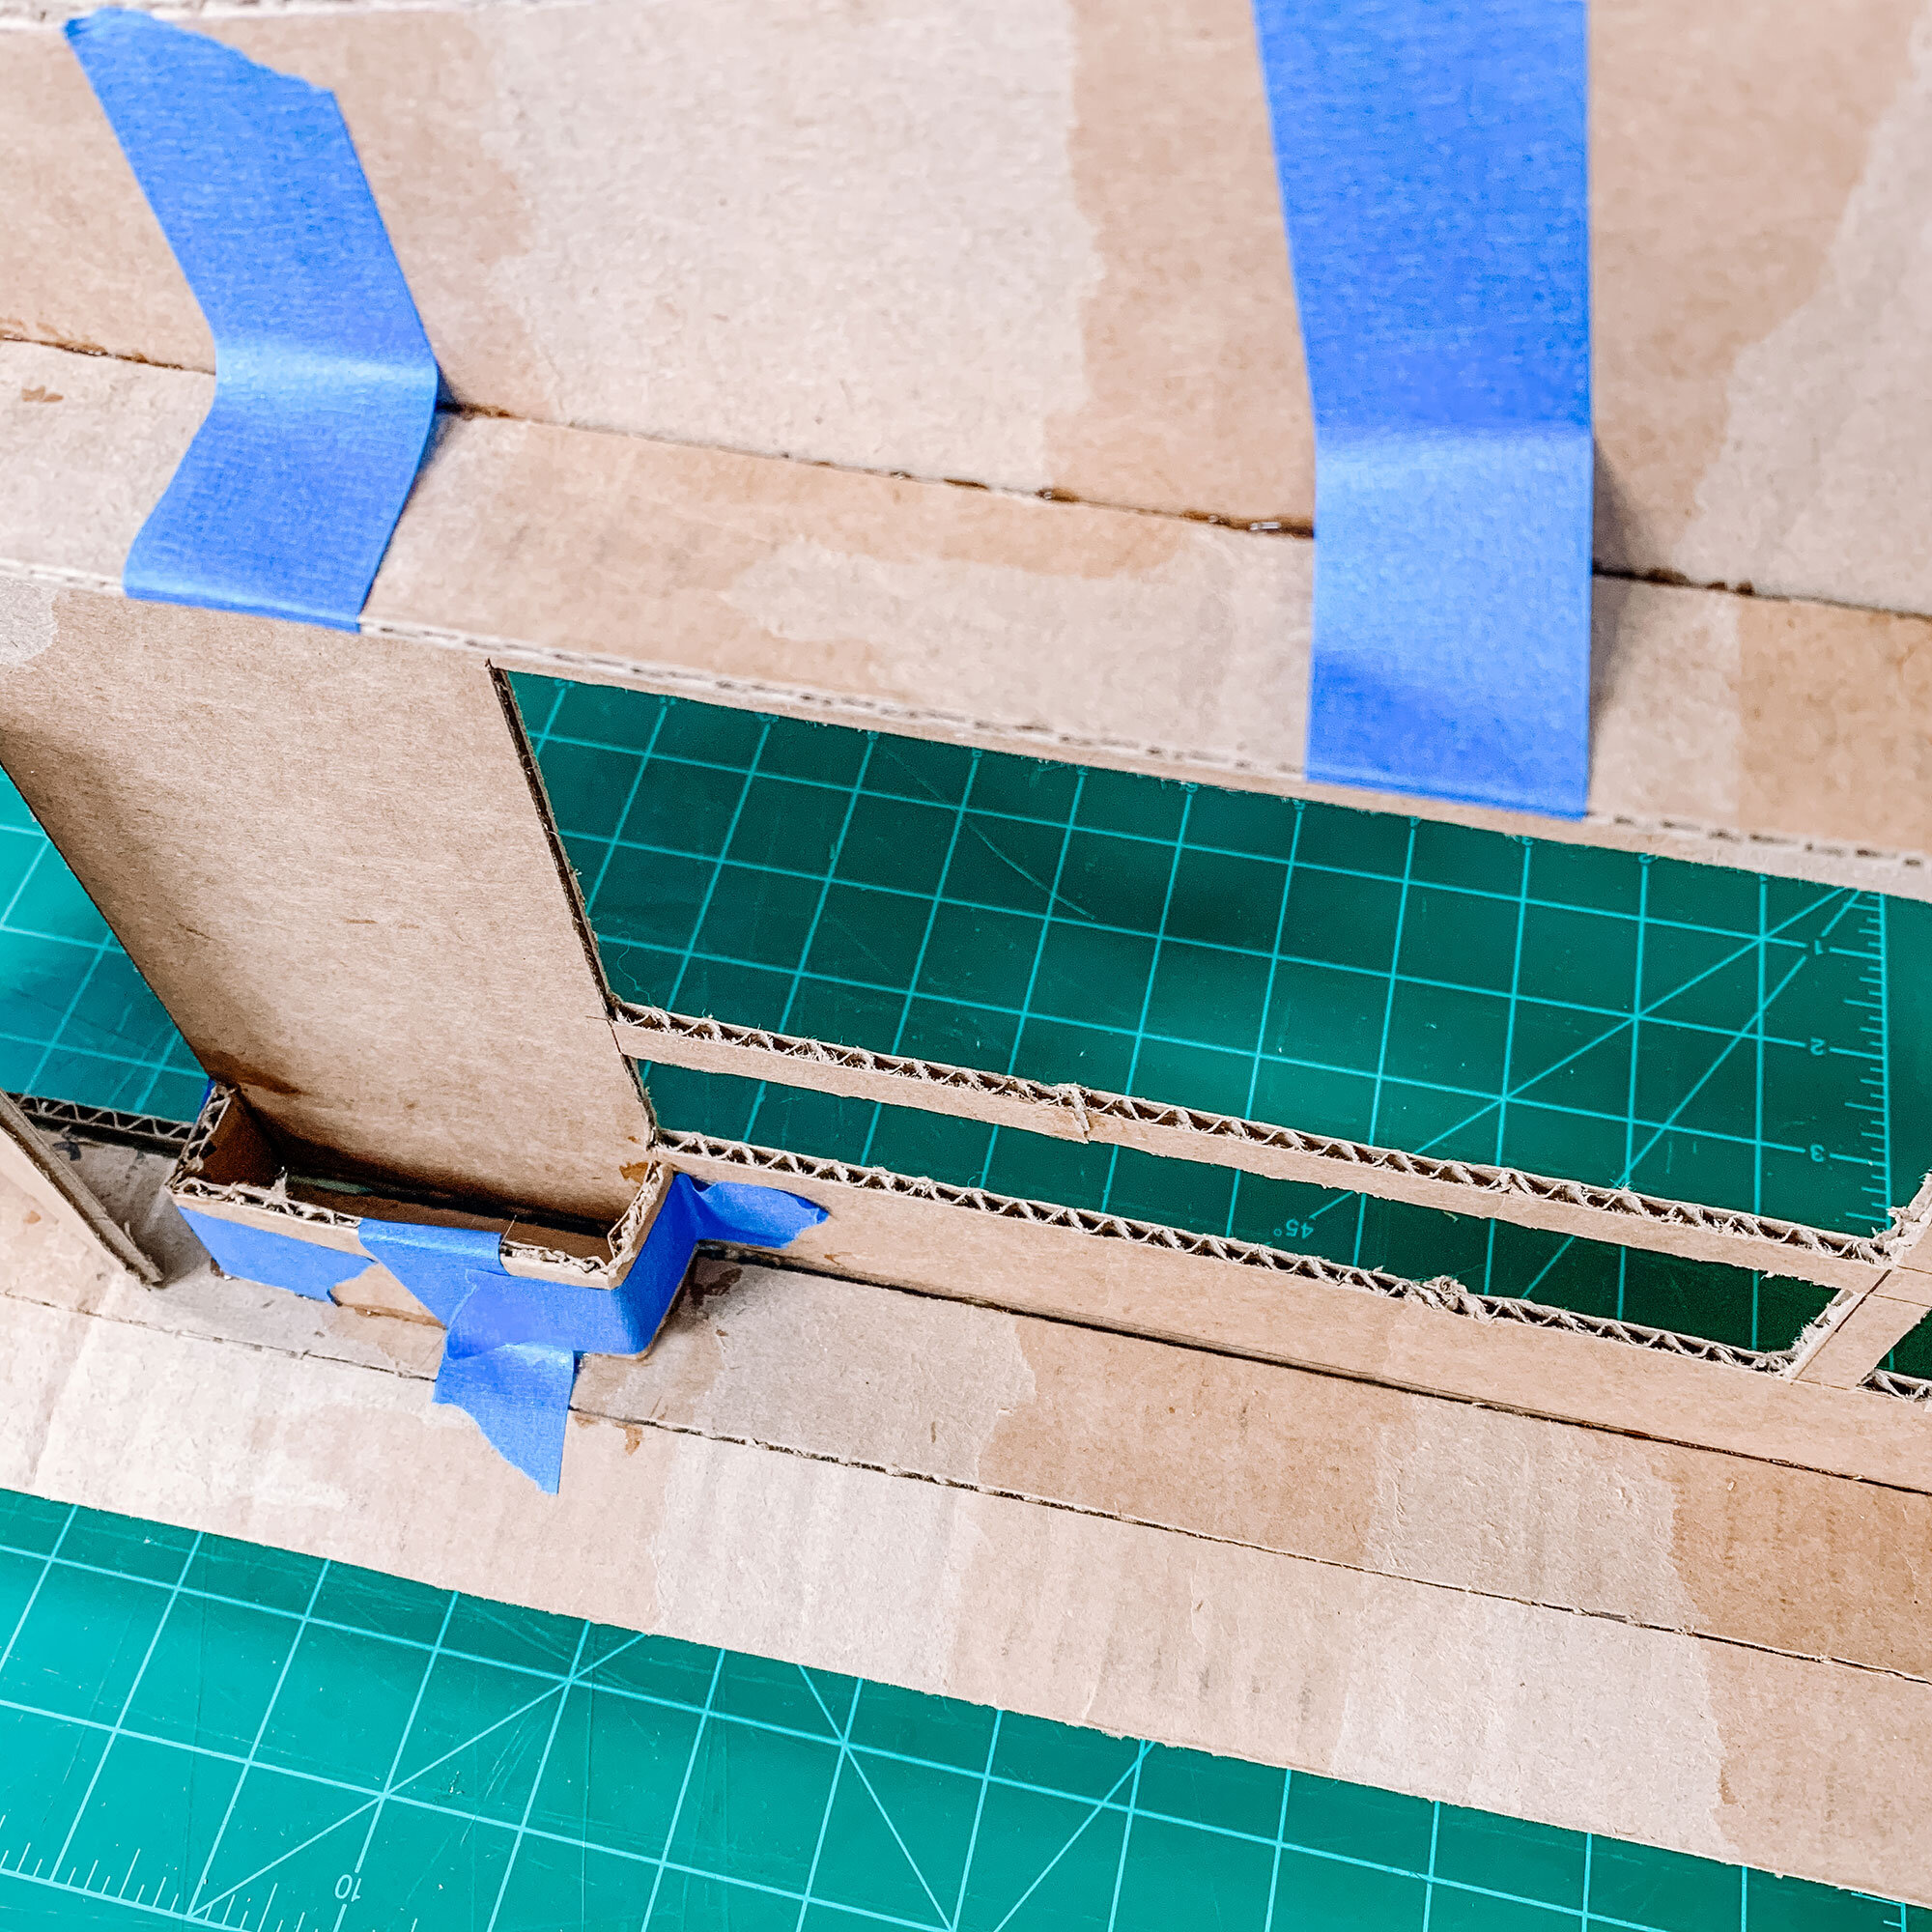
Tape and Glue
The fireplace, roof, step and planters can all be attached with glue. I used hot glue for instant hold, gorilla glue for long lasting hold, and tape to secure it while it dried.
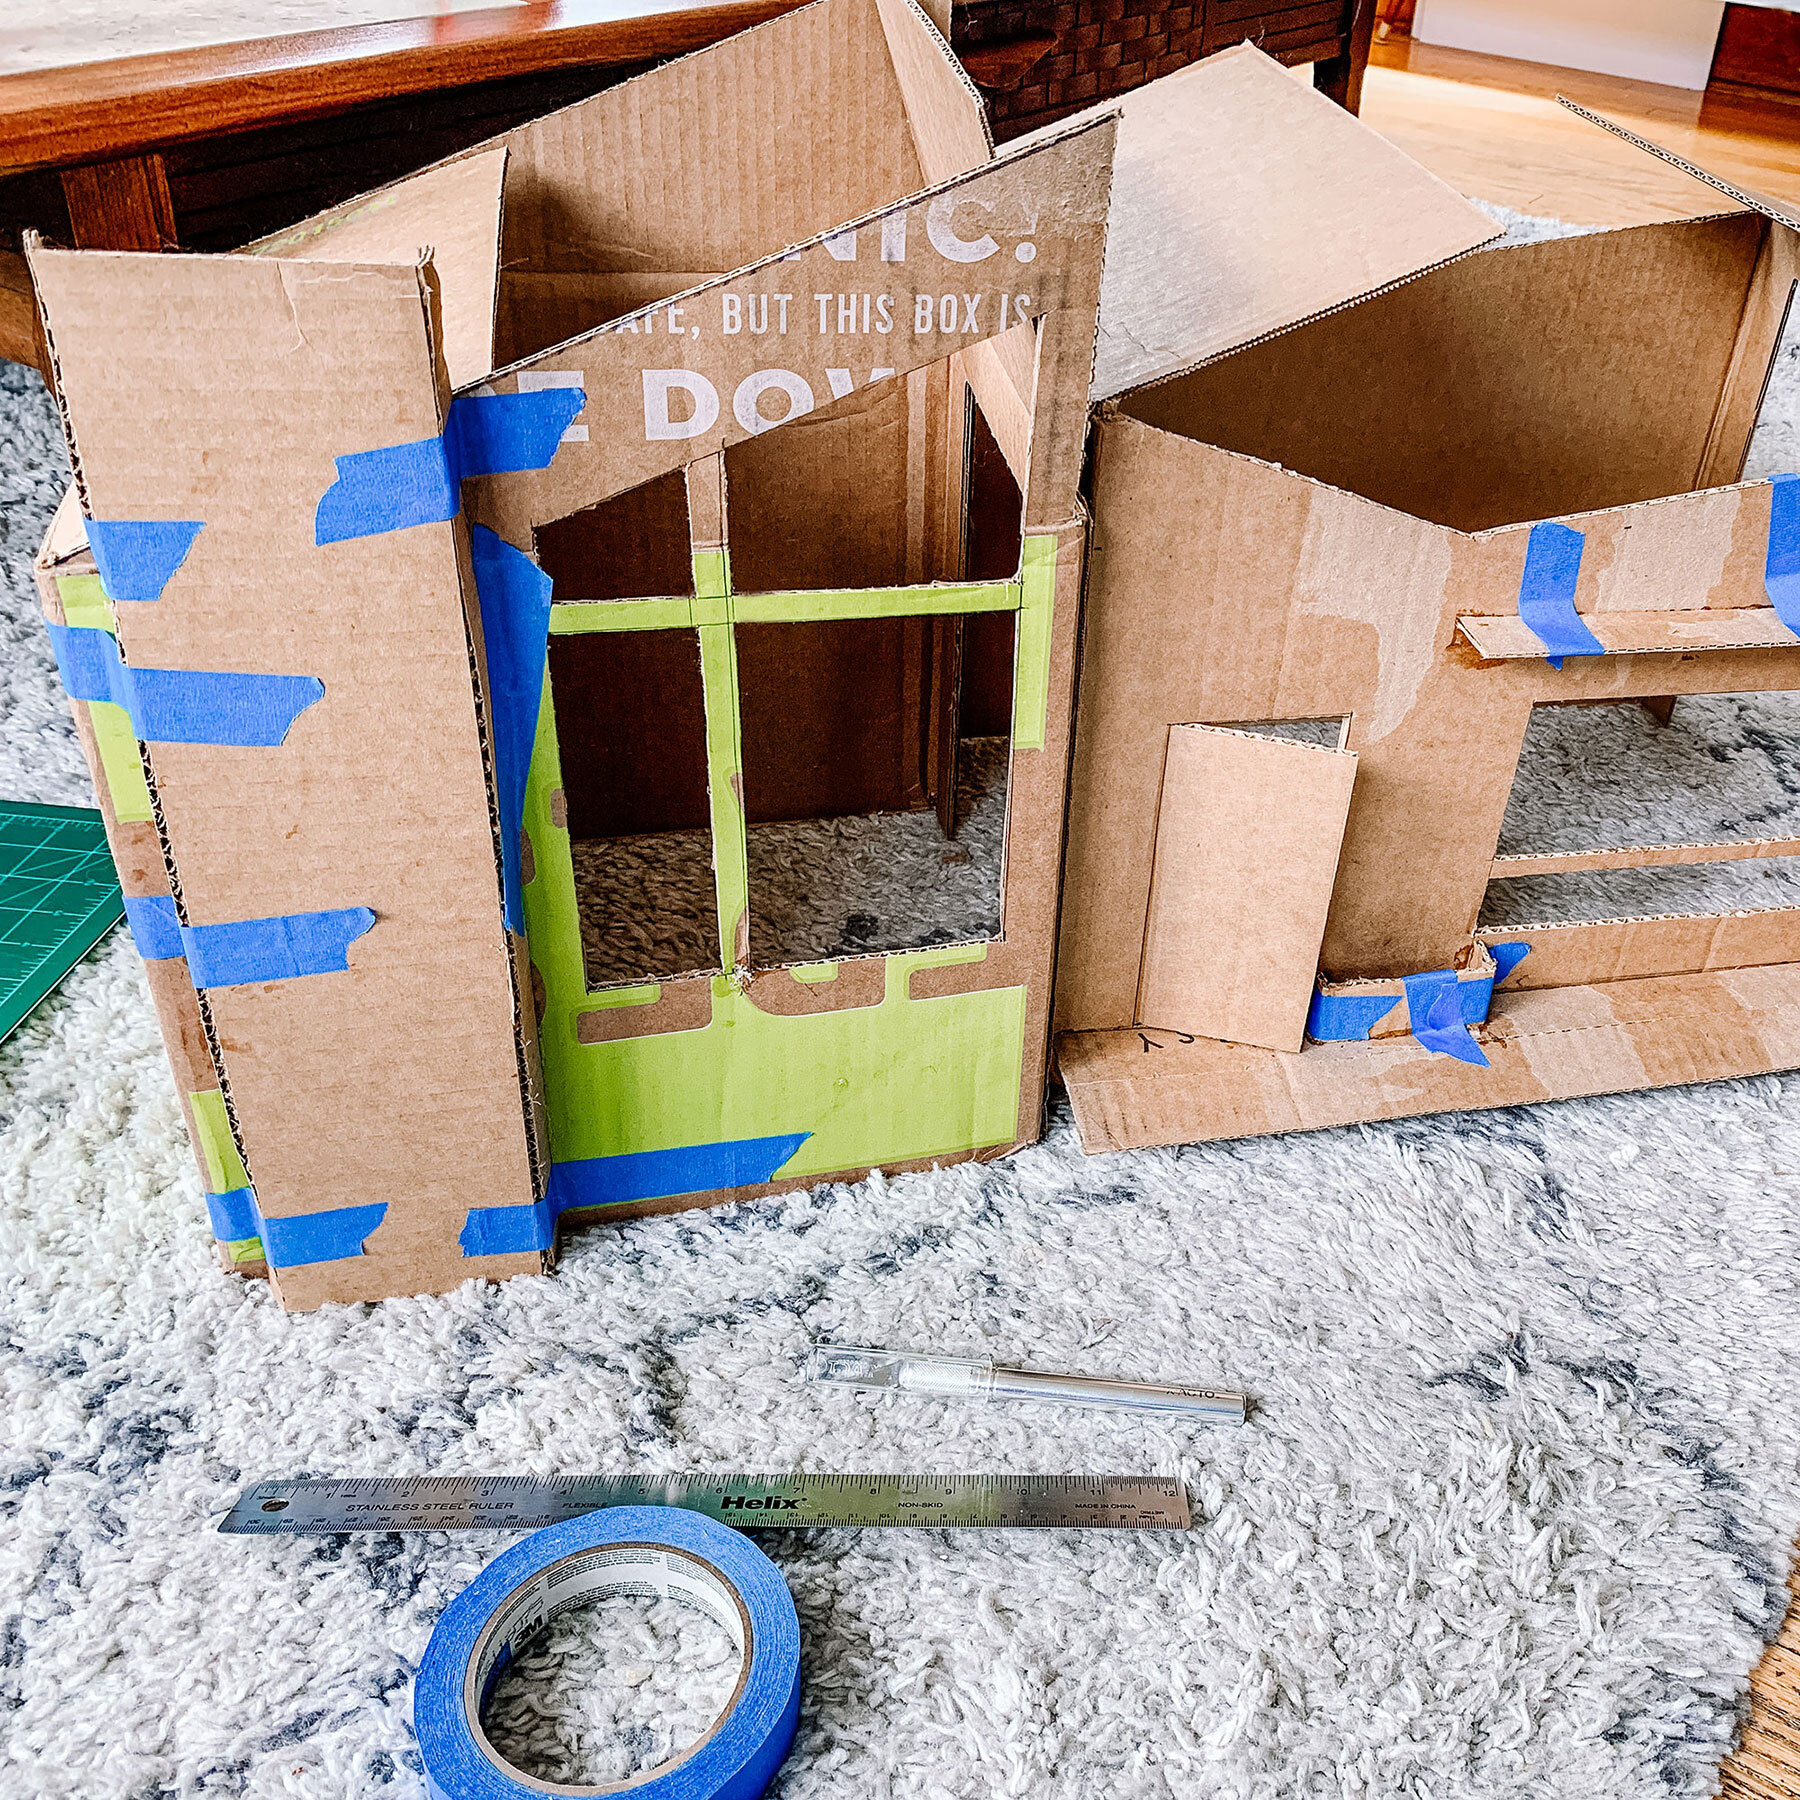
Assemble the House
Unflatten the boxes and glue them together, aligning the cat access cut outs. Take the top box flaps, fold them up so they align with the roof and glue them in place, let it dry, and then glue the actual roof on top of that.

Base Paint
Spray paint is the fastest way to paint and provides a foundation so everything else needs less coats.

Detail Paint
Paint in your details. This took me about two coats.
I have to say I surprised even myself on this one. Big ole pat on the back. I dream of owning a mid century house someday that I can renovate so why not build the cats one? Double surprise occurred in that they actually love it. So often I feel like we spend a lot of money on our pets and they just ignore it.
This project was free but did take me a weekend of work to complete it. However the second I finished it they were immediately investigating it and have spent the last few days sleeping inside of it. I am so pleased! Let me know how yours turns out and send me pictures. Happy crafting!