How to Make a Spooky Skull Bouquet
As an Amazon Associate I earn from qualifying purchases.

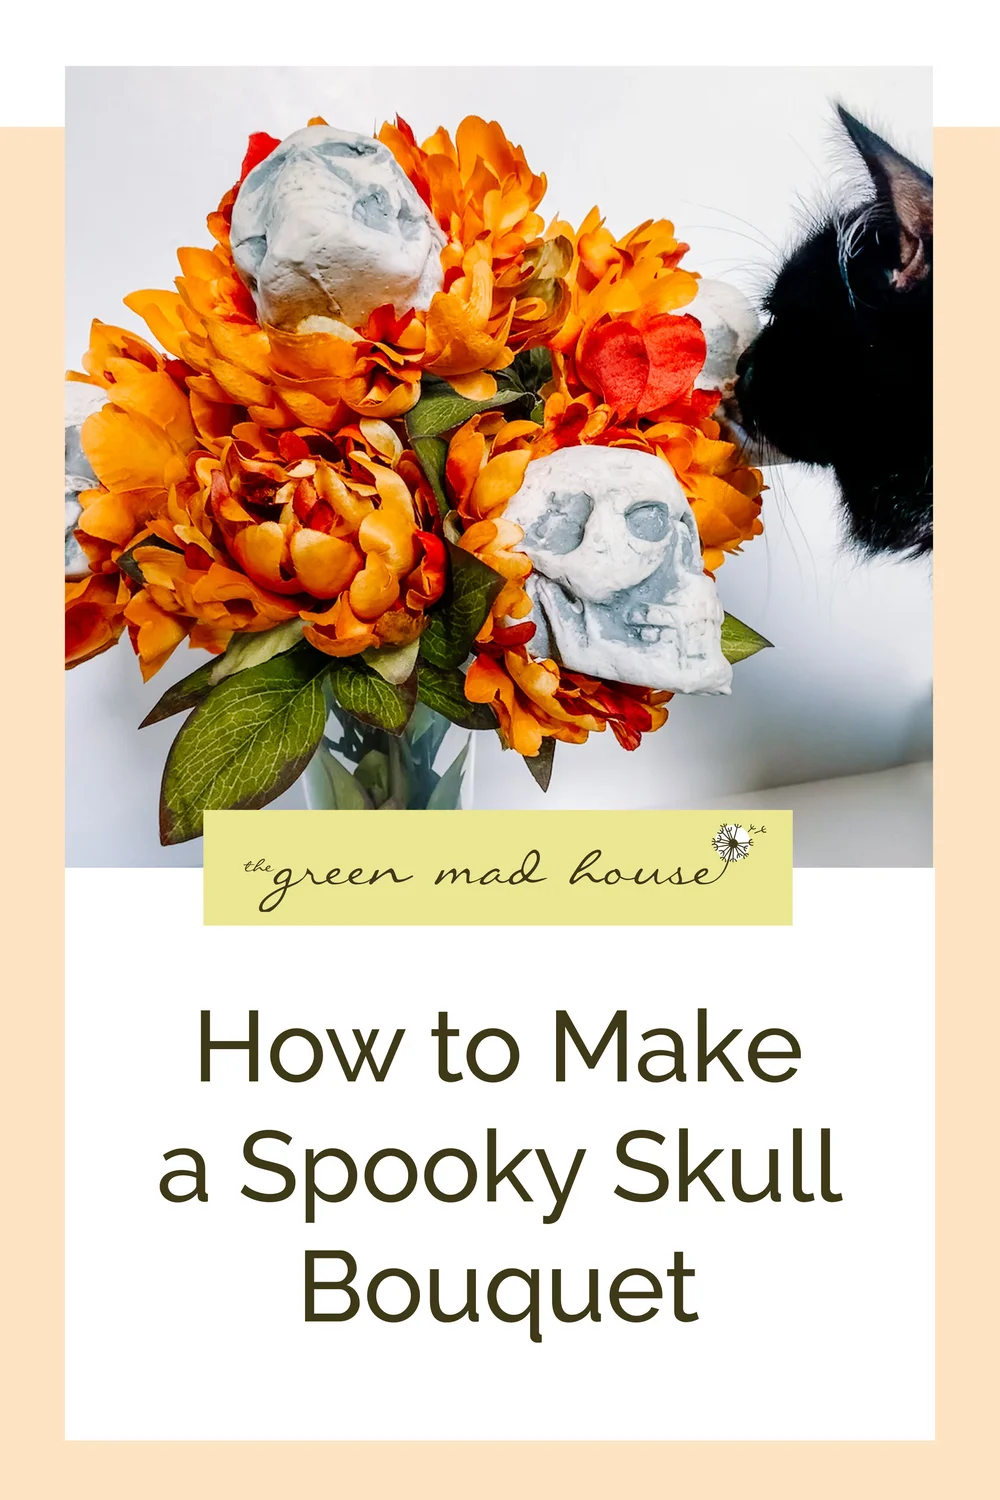
Bouquets are one of the easiest ways to decorate your space and so, I took some inspiration from Day of the Dead (dia de los Muertos), and made a skull bouquet. Day of the Dead is a Mexican holiday that celebrates life through death and is full of beautiful art and colors. Two of the main forms of imagery are Calavera and Cempasúchitl. Calavera, or sugar skulls, represent a departed soul. Cempasúchitl, yellow and orange marigolds, through their bright colors and strong aroma are used to guide spirits back to their families. So I took to finding some small skulls and some giant fake marigolds and make a centerpiece-worthy bouquet for any Halloween or Day of the Dead celebrating home.
This DIY is probably the easiest one I have ever done and only takes a couple of steps for instant results. Sadly, we can’t all have that 12 foot tall skeleton from Home Depot so this is about as close as I am getting in my apartment for now.
I found these 3” skulls on amazon and these perfectly colored fake flowers in the fall section of the store. After the skulls arrived I hit the craft store with one in tow. I am sure I looked weird walking through the aisles with a small skull comparing it to flowers but hey, a crafter has to craft. I have never bought fake plants in any form, I prefer the real any day of the week, so I did not realize how expensive it was. Did you all know this? Luckily I used a coupon and the bouquet was 40% off making this DIY pretty cheap
Check out my other Halloween DIYs.
I am selling some of my halloween decor in my Etsy Shop.
Tips & Tricks
When purchasing your skulls make sure they are foam else you won’t be able to slice it in half, insuring a nice flat surface to glue into the flower.
When gluing the skull in make sure to firmly press it for a couple minutes. Foam really absorbs glue so you will have to add more than you think and then hold it for longer to make sure it hardens.
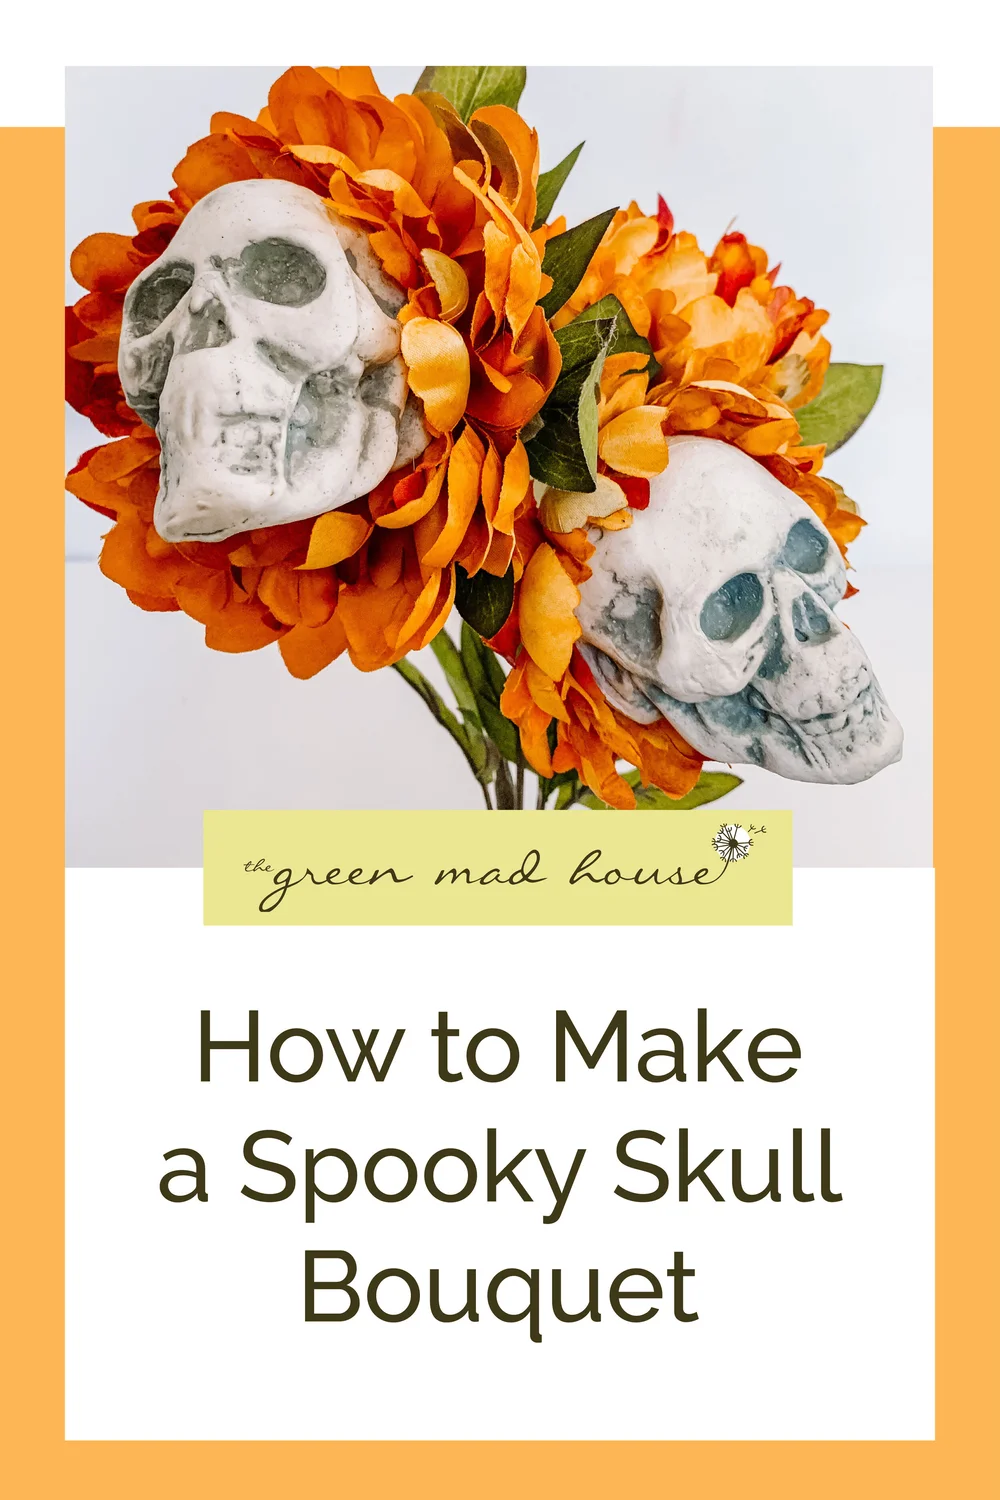
When choosing your fake flower, choose one that has a lot of petals so they can nicely settle around the skull, hiding where it is glued in. That is how I ended up going with peonies instead of sunflowers.


Supplies

Cut Skull
Cut the back of the skull off so you have a flat surface to glue too. I used a serrated knife to cut through the foam easier.

Clear Flower
Get rid of any of the internal bits by cutting them out with scissors.

Glue Skull
Put a coating of hot glue on your skull

Glue Flower
Press your skull on and apply a line of glue around all the edges.

Hold
Squeeze the skull for a couple minutes into the flower making sure it is glued firmly on there.
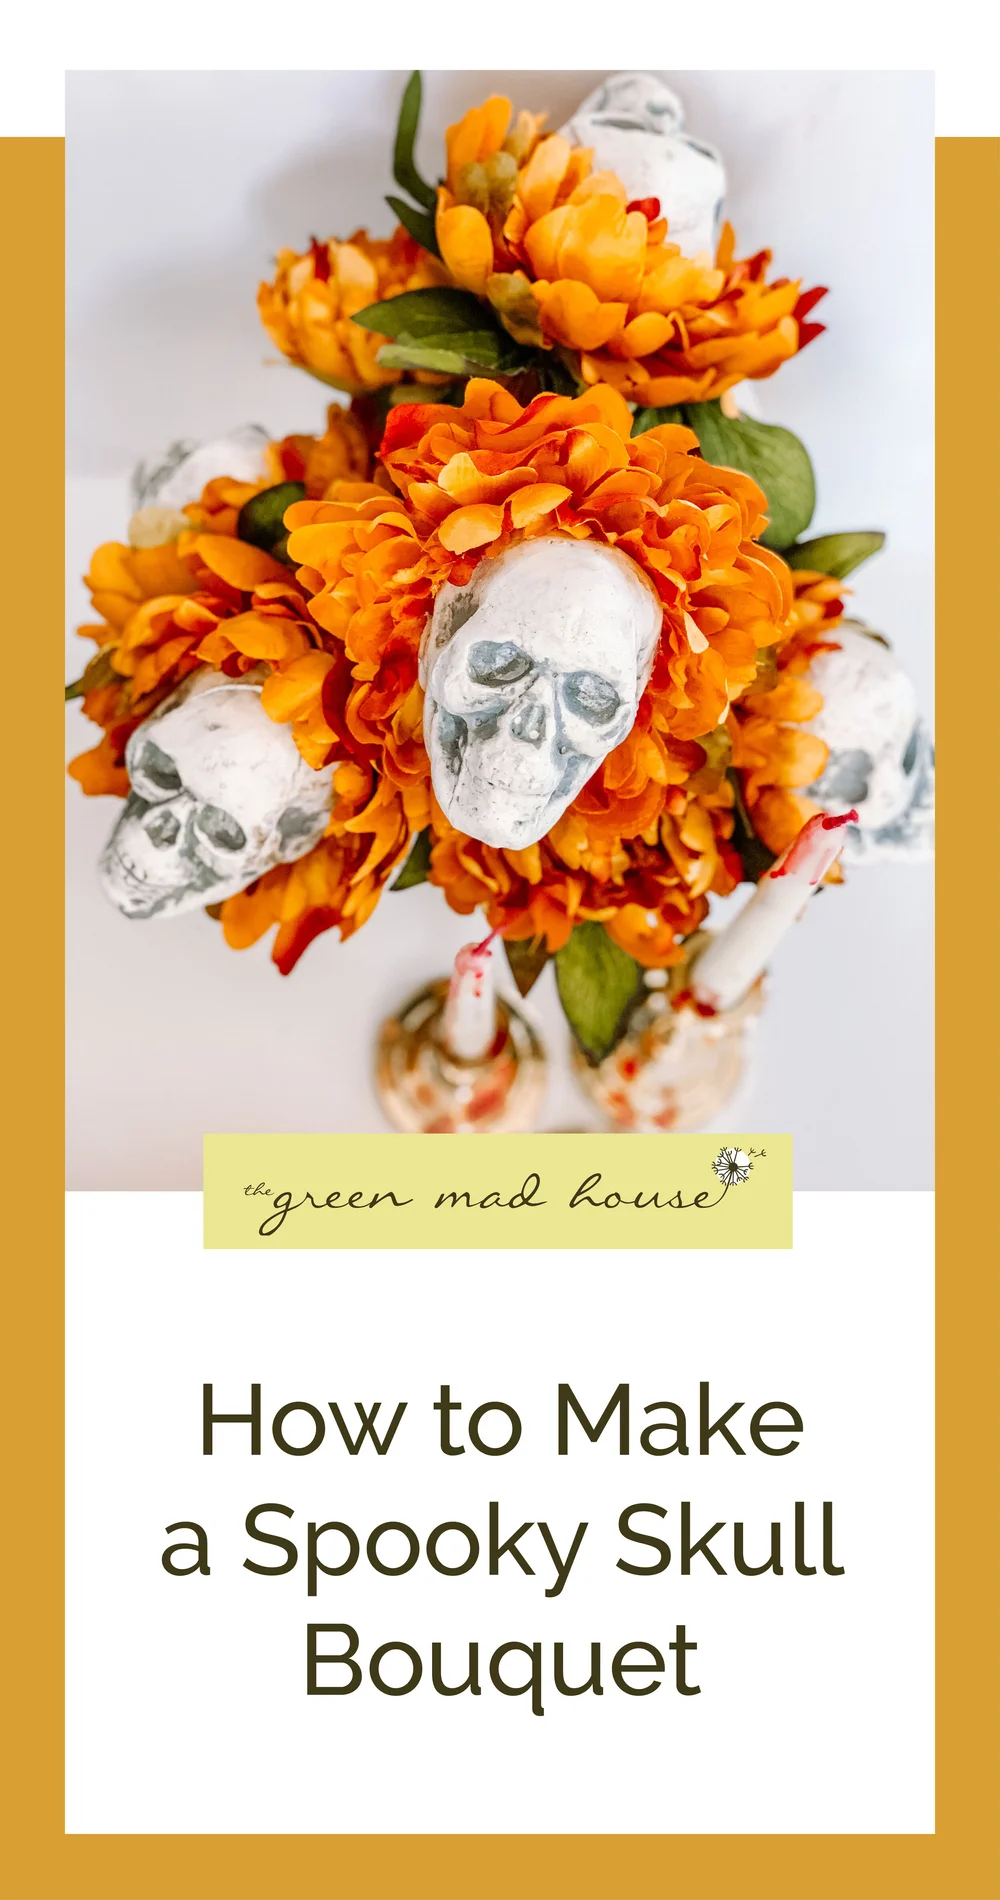
Five total steps! That is how easy this DIY is and the results are perfectly spooky. My dining room table is now a showstopper and definitely gives people a pause. I added some candlesticks with red dripping candles to round out the look. I think I just want some fake spider webs and I will be done. Huckleberry seems pretty happy with it too and if anyone knows exceptional Halloween decor it is a black cat! Hope you like this one and let me know how it turns out in the comments.